LIS3LV02DQ TRIPLE AXIS ACCELEROMETER + ARDUINO + TINKERPROXY + FLASH
This week I have been playing with the LIS3LV02DQ TRIPLE AXIS ACCELEROMETER (now retired) and attempting to get it spitting data into flash.
Here’s a quick run down of how to set up the system:
Get this stuff:
- Arduino
- LIS3LV02DQ TRIPLE AXIS ACCELEROMETER
- Breadboard or Protoshield
- TinkerProxy
- Some way of compiling flash movies
Do it:
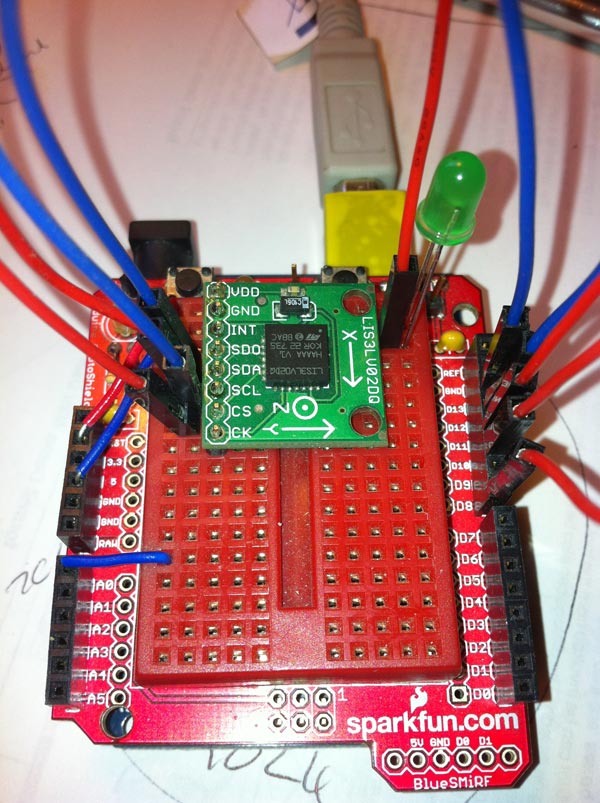
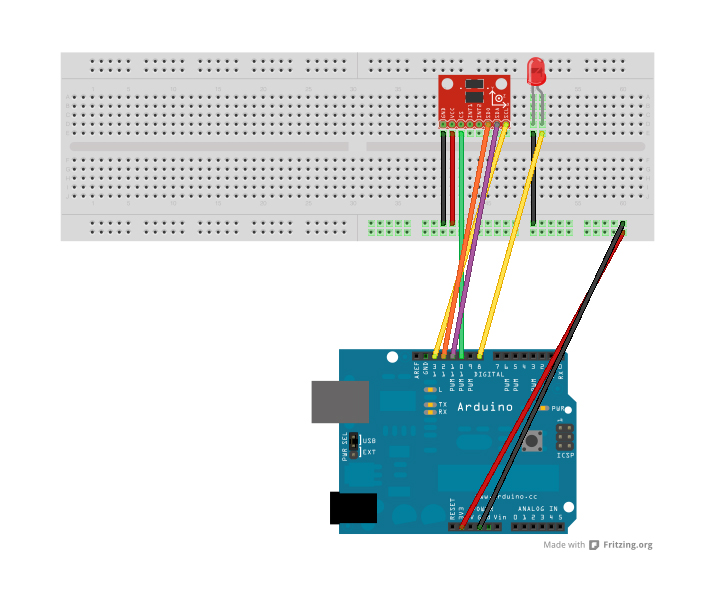
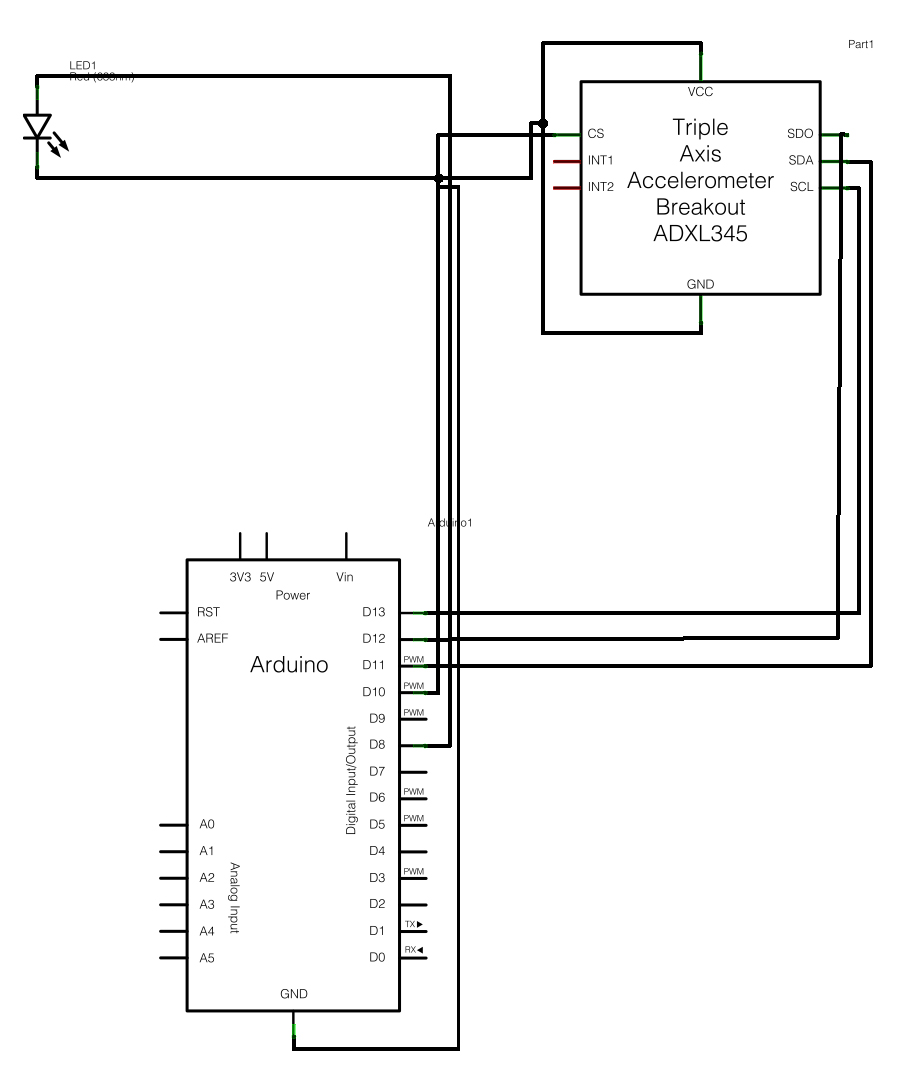
Plug stuff in. Plug the accelerometer into the breadboard (I added an LED too so I can run simple tests in my code) and hook up power and connections as in the diagrams below. Lots of interesting info and the original arduino code by Julian Bleecker is here. Note: these diagrams use a different accelerometer but the pins are equivalent.
Install Arduino and TinkerProxy. There are very clear instructions by Mike Chambers here. One thing that caught me out, however, was the config for TinkerProxy (or SerProxy): it is important to make sure that the value for serial_device1 in the TinkerProxy config on the mac is set to the /dev/cu_ serial port and NOT the /dev/tty serial port. This had me stumped for a while as I had both set to /dev/tty and couldn’t work out why I was getting EOF from SIO errors.
By the way you can get a list of ports on the Mac by opening a terminal and entering $ ls -l /dev/ at the prompt.
Program the Arduino. I downloaded the source from nearfuturelaboratory.com, merged it with the blink script from Mike Chambers and made a few modifications: I stripped out all the serial.prints so that the only thing that would be sent to flash would be the values for the 3 coordinates “x,y,z” as a comma delimited string (is there a better way to do this?). This is going to make it easy to parse into an array of integers to supply values to my flash code.
Connect it all together. Arduino hooks up to computer via USB as usual, the accelerometer gets it’s power from the 3.3V pin (don’t know why Julian Bleecker uses the 5V pin). Open the Arduino IDE and select the correct flavour of board from Tools -> Board__ and select the correct port from _Tools -> Serial Port. Start a new project and open the Accelerometer_Arduino.pde script. Upload the script to the Arduino board and open the serial monitor. You can toggle the LED’s blinking by entering “t” and SEND. Should now see a stream of data in the serial monitor. Wave the accelerometer around and watch the values changing. If you place any of the chip’s axes normal to the ground, you should see the value 1024 (or -1024). If all that works ok the next thing to do is set up and run TinkerProxy.
Tinker Proxy. This is my config file, I’m running OSX 10.6 my flash movie is going to be written in AS3
Config file for serproxy
See serproxy’s README file for documentation
#Transform newlines coming from the serial port into nils
#true (e.g. if using Flash) or false
newlines_to_nils=false
#on a mac you will need to add this
serial_device1=/dev/cu.usbmodem3d11
#Comm ports used
comm_ports=1
#Make sure to use the /dev/cu serial port. Earlier versions of actionscript required newlines_to_nils=true
#Default settings
comm_baud=9600
comm_databits=8
comm_stopbits=1
comm_parity=none
#Baud rate can be set to any legal value.
#Idle time out in seconds
timeout=300
#Port 1 settings (ttyS0)
net_port1=5331
The port number must match the port number defined in the Arduino script.
Rename serproxy.cfg to serproxy.osx.cfg if you’re on a mac. Run TinkerProxy from a terminal session by cd’ing to the TinkerProxy directory and entering $ ./serproxy.osx you should get a “Waiting for clients” message.
//The digital pin that the LED is connected to

#define LED_PIN 8
I changed the pin for the LED to 8 from 13 as the accelerometer is using Pin 13
        Serial.print(x_val, DEC);
      //..
        Serial.print(","); Serial.print(y_val, DEC);
      //..
        Serial.print(","); Serial.println(z_val, DEC);
I removed all Serial.prints and modified the code so that arduino will send just the 3 integer values from the accelerometer as a comma delimited string.
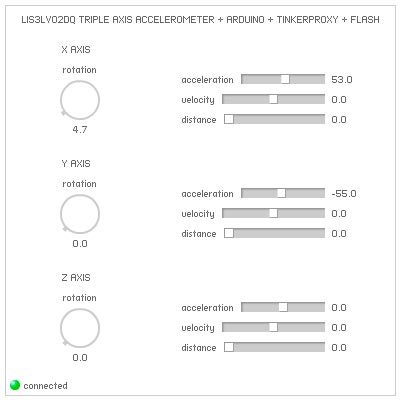
Create the flash movie. I’m using Flash Builder 4.5 to create a pure actionscript project. I have the greensock tweenlite library in my library path and minimalcomps src in my build path so I can use some simple components for the interface and apply some tweening to the resulting animation to smooth out the motion of the sliders and knobs Ill be using. The finished interface is below. I should be able to see the values updating in near real-time as I wave the accelerometer around.

For the main part the actionscript code is the same as Cliff’s but I created a new Widget class that is going to create a strip of controls for one axis comprising a Knob component to display angle, and three sliders for acceleration, velocity and distance. Here’s the createChildren method, I have given each of the controls appropriate min and max values:
/**
* create the child components
*/

private function createChildren():void{

    var label :Label = new Label(this, 0,0, axis+" AXIS");

    knob = new Knob(this, 0, 20, "rotation");
    knob.minimum = 0;
    knob.maximum = 180;
    knob.value = 0;

    slider1 = new HUISlider(this, 120,30, "acceleration");
    slider1.minimum = -1024;
    slider1.maximum = 1024;
    slider1.value = 0;

    slider2 = new HUISlider(this, 120,50, "velocity");
    slider2.minimum = -1000;
    slider2.maximum = 1000;
    slider2.value = 0;

    slider3 = new HUISlider(this, 120,70, "distance");
    slider3.minimum = 0;
    slider3.maximum = 2;
    slider3.value = 0;
}
And here is the update method that will get called every time we get data from the arduino:
/**

* update the gui
* @param val - the reading from one axis of the accelerometer
* @param ms - the elapsed time in milliseconds
*
*/

public function update( val :int, ms :int ):void{

    var dt :Number = ms/1000.;//convert milliseconds to seconds
    var a :int = val - 1024;//compensate for gravity
    var v : Number = a*dt;//calculate velocity
    var d : Number = v*dt;//calculate distance
    var r : Number = a*g_to_dir;//convert g force to direction


    //add a little smoothing with tweenlite
    TweenLite.to(knob,0.1,{"value": r});
    TweenLite.to(slider1,0.1,{"value": a});
    TweenLite.to(slider2,0.1,{"value": v});
    TweenLite.to(slider3,0.1,{"value": d});
}
Each call to update will be received by the Widget responsible for displaying the data for one of the axes. The parameters are val (an int) which is the value for the axis and ms which is the number of milliseconds elapse since the last update.
- I convert milliseconds to seconds by dividing by 1000.
- I set the variable a to val and I subtract 1024 to compensate for gravity.
- Next I calculate velocity (v) which is the acceleration (a) multiplied by elapsed time in seconds (dt).
- To calculate distance (d) I multiply velocity by dt again.
- The final value rotation (r) uses
private var g\_to\_dir :Number = 360/4096to calculate a rotation in degrees of the axis from straight down.
Since the accelerometer can only measure angle and not direction we don’t know if the accelerometer is tipped +20 or -20 degrees.. we just know it’s 20.. is there a way to fix this?
Finally I run the values through a TweenLite.to method to add a little smoothness to the movement.
If you look in the Main.as file you’ll see where I’m creating the widget instances and where I’m calling the update code for each one.
And that should be it. If everything is working correctly the sliders and knob should update as you wave the accelerometer around. Here’s a video of it in action:
Links:
LIS3LV02DQ accelerometer setup
TinkerProxy
Flash Arduino setup
MinimalComps


